
As an Amazon Associate I earn from qualifying purchases and sometimes recommend products from other sellers at no extra cost you. For more details see my disclosure policy and privacy policy.
Building your first automated factory in Factorio feels like solving an elaborate puzzle. The pieces are simple enough—conveyor belts move items, inserters transfer them, and assemblers build them—but figuring out how they work together efficiently takes practice. Once you understand these three systems, you’ll transform from manually crafting everything to running production lines that practically manage themselves.
Let’s break down how to make these automation fundamentals work for you.
🎯 Understanding the Automation Trinity
Every automation setup in Factorio relies on three core components working together. Conveyor belts transport raw materials and finished products throughout your factory. Inserters act as the mechanical hands that pick up items from one location and place them in another. Assemblers take those ingredients and automatically craft items according to recipes you assign them.
⚙️ Factorio Belt Speed Comparison
At a Glance: Transport Belt Throughput Guide
| Belt Type | Items/Second (Full Belt) |
Items/Second (Per Lane) |
Speed Multiplier | Tiles/Second |
|---|---|---|---|---|
|
Yellow Belt
(Transport Belt)
|
15 | 7.5 | 1x (Baseline) | 1.875 |
|
Red Belt
(Fast Transport Belt)
|
30 | 15 | 2x faster | 3.75 |
|
Blue Belt
(Express Transport Belt)
|
45 | 22.5 | 3x faster | 5.625 |
📋 Quick Reference Notes
- Full Belt = Both lanes carrying items at maximum capacity
- Red belts require significantly more resources but double your throughput
- Blue belts need lubricant (oil processing) and are 3x faster than yellow
- Each belt lane can hold 4 items per tile regardless of belt type
- Yellow inserters struggle with blue belts—use faster inserters for high-speed lines
- Cost-benefit tip: Stick with yellow belts early game; upgrade main bus lines to red/blue as production scales
- A single yellow belt can feed approximately 15-20 assemblers depending on recipe complexity
Think of it like an assembly line in a car factory. The conveyor moves parts down the line, robotic arms grab what’s needed and place it where it belongs, and workstations assemble the final product. Your Factorio factory works the same way, just with copper plates instead of car doors.
Chill Place Gaming Store
Take your game further 🎮
Reference sheets, printable guides, and gaming goodies — made by the Chill Place Gaming team to help you play smarter.
Secure checkout
powered by Shopify
The key insight for beginners learning strategy games is that automation isn’t just about convenience. It’s how you scale production to match the game’s increasing demands.
🧠 Belt Management Strategies
Loading Both Sides of Your Belts
Here’s something that trips up many new players: inserters always place items on the far lane of a belt, regardless of which side they’re on. This means you can strategically position inserters on both sides of a belt to fully load it, doubling your throughput without adding more belts.
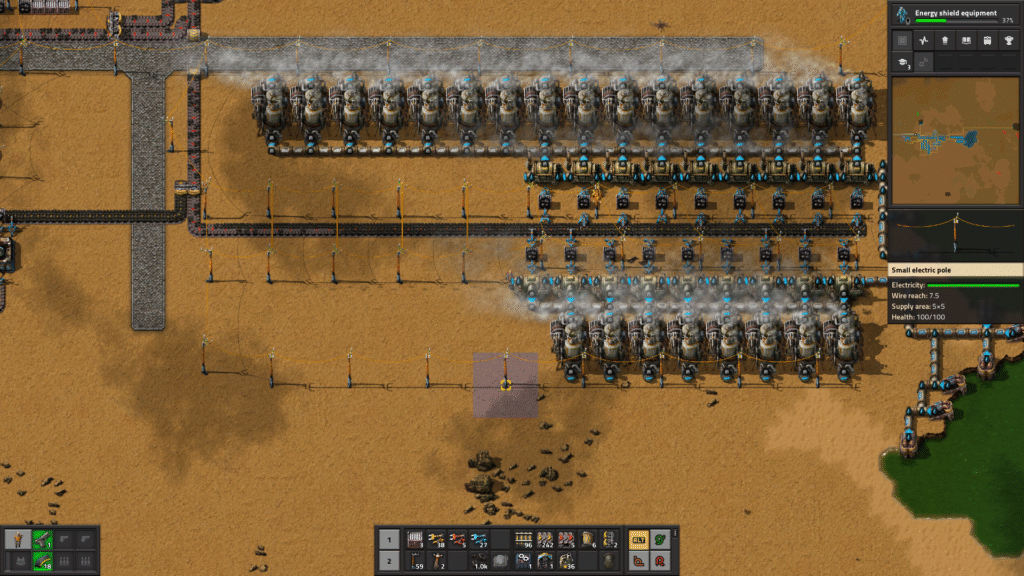
For maximum efficiency on fast belts, try placing inserters on either side of a splitter. This advanced technique helps saturate express belts when a single inserter can’t keep up. Different inserter types also affect how items distribute across lanes, so experiment with positioning to see what works best for your setup.
Smart Resource Distribution
Splitters are your best friend for dividing resources between multiple production lines. Use them to evenly distribute materials so related products converge efficiently near your assemblers. This prevents bottlenecks where one machine starves while another sits idle.
Underground belts deserve special attention too. They let other belts and factory components cross cleanly without creating a tangled mess. As your factory grows, you’ll find yourself using underground belts constantly to prevent clutter and make future expansion easier.
Early Automation Priorities
Automate belt and inserter production as soon as humanly possible. These are basic items you’ll need in massive quantities throughout the game. Setting up dedicated assemblers for them early saves you from spending hours manually crafting hundreds of belts when you’d rather be expanding your factory.
⚡ Inserter Configuration and Optimization
Matching Speed to Your Needs
Not all inserters need to be fast. Yellow (basic) inserters work fine for slow-moving materials and low-volume production lines. Save your faster blue inserters and stack inserters for high-throughput operations like smelter arrays where speed actually matters.

The speed difference becomes critical when you’re trying to keep fast belts saturated. A basic yellow inserter simply can’t grab and place items quickly enough to feed an express belt at full capacity. This is where upgrading to faster inserters directly improves your production output.
Advanced Positioning Techniques
Long-handed inserters let you grab from belts further away, which opens up compact build designs. You can feed secondary inputs like gears or circuits into assemblers without dedicating entire belt lanes to them. This keeps your layouts tight and organized.
For complex setups, inserting directly onto a splitter or using multiple inserters working together helps achieve the belt saturation that single inserters can’t manage. These techniques become essential as you scale up production and need every bit of throughput you can squeeze out.
🔧 Assembler Best Practices
Direct Feeding vs Belt Feeding
Early in the game, the simplest approach is feeding basic resources directly into adjacent assemblers or with short belt runs. This keeps your builds flexible and easy to modify as you learn what production ratios work best. Don’t overthink your initial layouts—you can always rebuild them later with better understanding.
For simple recipes requiring just one or two ingredients, direct insertion from one assembler to another works beautifully. This eliminates belts entirely and creates compact, efficient production chains. The resource management tactics you develop here will serve you throughout the game.
Automating Intermediate Products
Stop mass-producing items by hand. Dedicate assembler chains to automatically producing gears, circuits, belts, inserters, and science packs as soon as you can. These intermediate products form the foundation of everything else you’ll build, so having a steady automated supply is crucial.
The shift from manual crafting to automated production represents a fundamental change in how you approach Factorio. Once you have automated intermediates running, you’ll wonder how you ever played without them.
Preventing Overproduction
Limit your assembler chest outputs to prevent overproduction and avoid wasting resources. When chests fill up, inserters stop placing items, which naturally throttles production to match your actual consumption. This prevents your factory from churning out thousands of items you don’t need while more important production lines sit starved for resources.
Setting reasonable limits also keeps your factory organized. Nothing’s worse than having random chests scattered everywhere overflowing with products you crafted days ago and forgot about.
💡 Quick Troubleshooting and Efficiency Tips
When Things Stop Working
If inserters seem stuck or won’t place items, start by checking power connections. No electricity means nothing moves. Next, look for belt congestion—inserters can’t place items on belts that are completely full. The solution is usually adding another belt lane or consuming items faster downstream.
Always verify that critical raw materials like iron and copper plates are actually reaching your assemblers before troubleshooting inserter or assembler issues. Many problems that look complex are just resource starvation.
Time-Saving Techniques
Use shift-click to quickly copy assembler recipes and layouts. This simple shortcut speeds up early expansion tremendously. When you find a design that works, you can replicate it in seconds rather than manually configuring each machine.
Modular design makes later upgrades easy. Keep production lines neat and organized so you can branch off or scale up without tearing everything apart. Leave space between major production areas—you’ll thank yourself later when you need to add more capacity.
Advanced Considerations
When using circuit networks to change assembler recipes dynamically, remember that new recipes only take effect after the current craft finishes. Also note that leftover input items may end up in an internal dump inventory rather than staying on the belt, which can affect your designs.
🎮 Putting It All Together
Mastering belts, inserters, and assemblers transforms Factorio from a confusing puzzle into an elegant automation challenge. Start with simple direct-feed designs using basic inserters and short belt runs. As you grow more comfortable, expand to more complex layouts with splitters distributing resources to multiple production lines.
The beauty of simulation games like Factorio is that there’s no single “correct” way to build your factory. Experiment with different configurations, learn what works for your playstyle, and gradually optimize as you discover bottlenecks. Your early chaotic spaghetti factories will evolve into organized production complexes as you internalize these automation fundamentals.
For more detailed strategies on scaling up your Factorio operation, check out our comprehensive Factorio review and essential materials guide. Once you’ve mastered basic automation, you’ll be ready to tackle more advanced topics like train networks and circuit-controlled systems.


